0

Using Crafts to Teach Speech


Crafts are a fun and easy activity to do with your toddler, but it can often be a silent one. A lot of non verbal toddlers enjoy doing crafts because they can do it by them selves and not have to necessarily communicate.

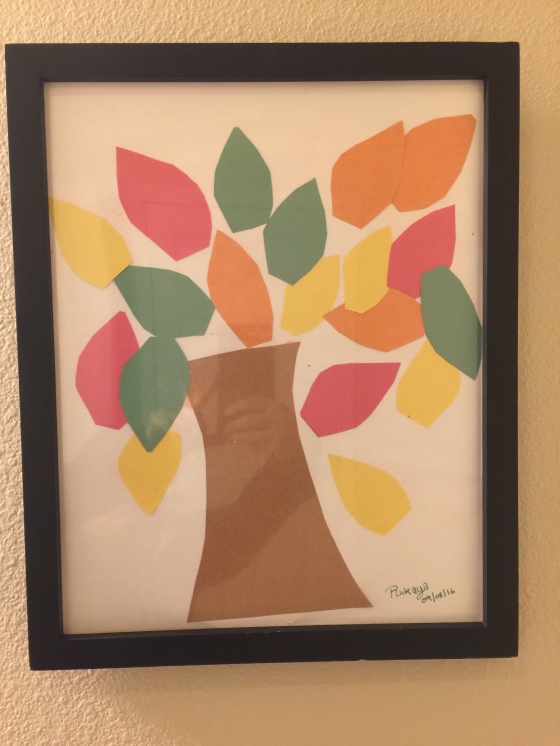
But they are a great tool to start teaching words. As an example I wanted to show a project I did with my daughter where we were learning the words “glue” and “pat”

IMG_1090.jpg

What you need:

construction paper

scissors

glue sticks (using glue sticks is easier than using wet glue, just save your self the trouble of the lengthy clean up!)

Frame (optional, but you can a cheap plastic one from you local drug store, Walmart or even Michaels)

Prep for the activity 

  1. Think about a word that your toddler does know or like. It can be anything from Moon, House, Bear, Mickey or in my case: Tree.  ***** Its important to choose something familiar because it gives a foundation to build up from. Since they recognize the word they will be engaged
  2. Cut up the shape of the images with construction paper, and tape down the plain white paper on to the table

The Activity 

The activity itself is simple just have them glue the image together but here are how you can incorporate language into it

  1. Choose one or two words that you are going to be using. In my case it was “glue” and “pat”. You can do “star” if you are making the night sky, or maybe a color
  2. Verbalize the action or the item as you do it for a few times
  3. Now withhold the item (in my case I held back the glue to have her ask for it)
  4. Let your child throw a tantrum and cry
  5. Verbalize the word (glue) and give it to them

The reason you need to with hold it is because you want them to go from passively hearing the word to actively hearing it.

Hope this example helps you get talking with your little one 🙂


0

Life Menus for Speech Delayed Toddlers


Terrible twos. Its a cursed time.

They know what they want. They have stubbornness to only want that. AND they can’t tell you that and get angry with you for not understanding.

My two-year old daughter is very particular about what she wants and when she wants and  is pretty non-verbal still. So its just a battle ALL the time! And yes, a lot of times I know what she wants (mother’s intuition maybe?) but it’s not helpful for her language development if I just give her what she wants without her communicating.

A lot of the difficulty with children with speech delay is that the concept of language is just abstract. For example, my daughter is a great labeler, she can point out moon and car etc. But will she use those words to indicate her needs. NOPE. Thats still just a cry.

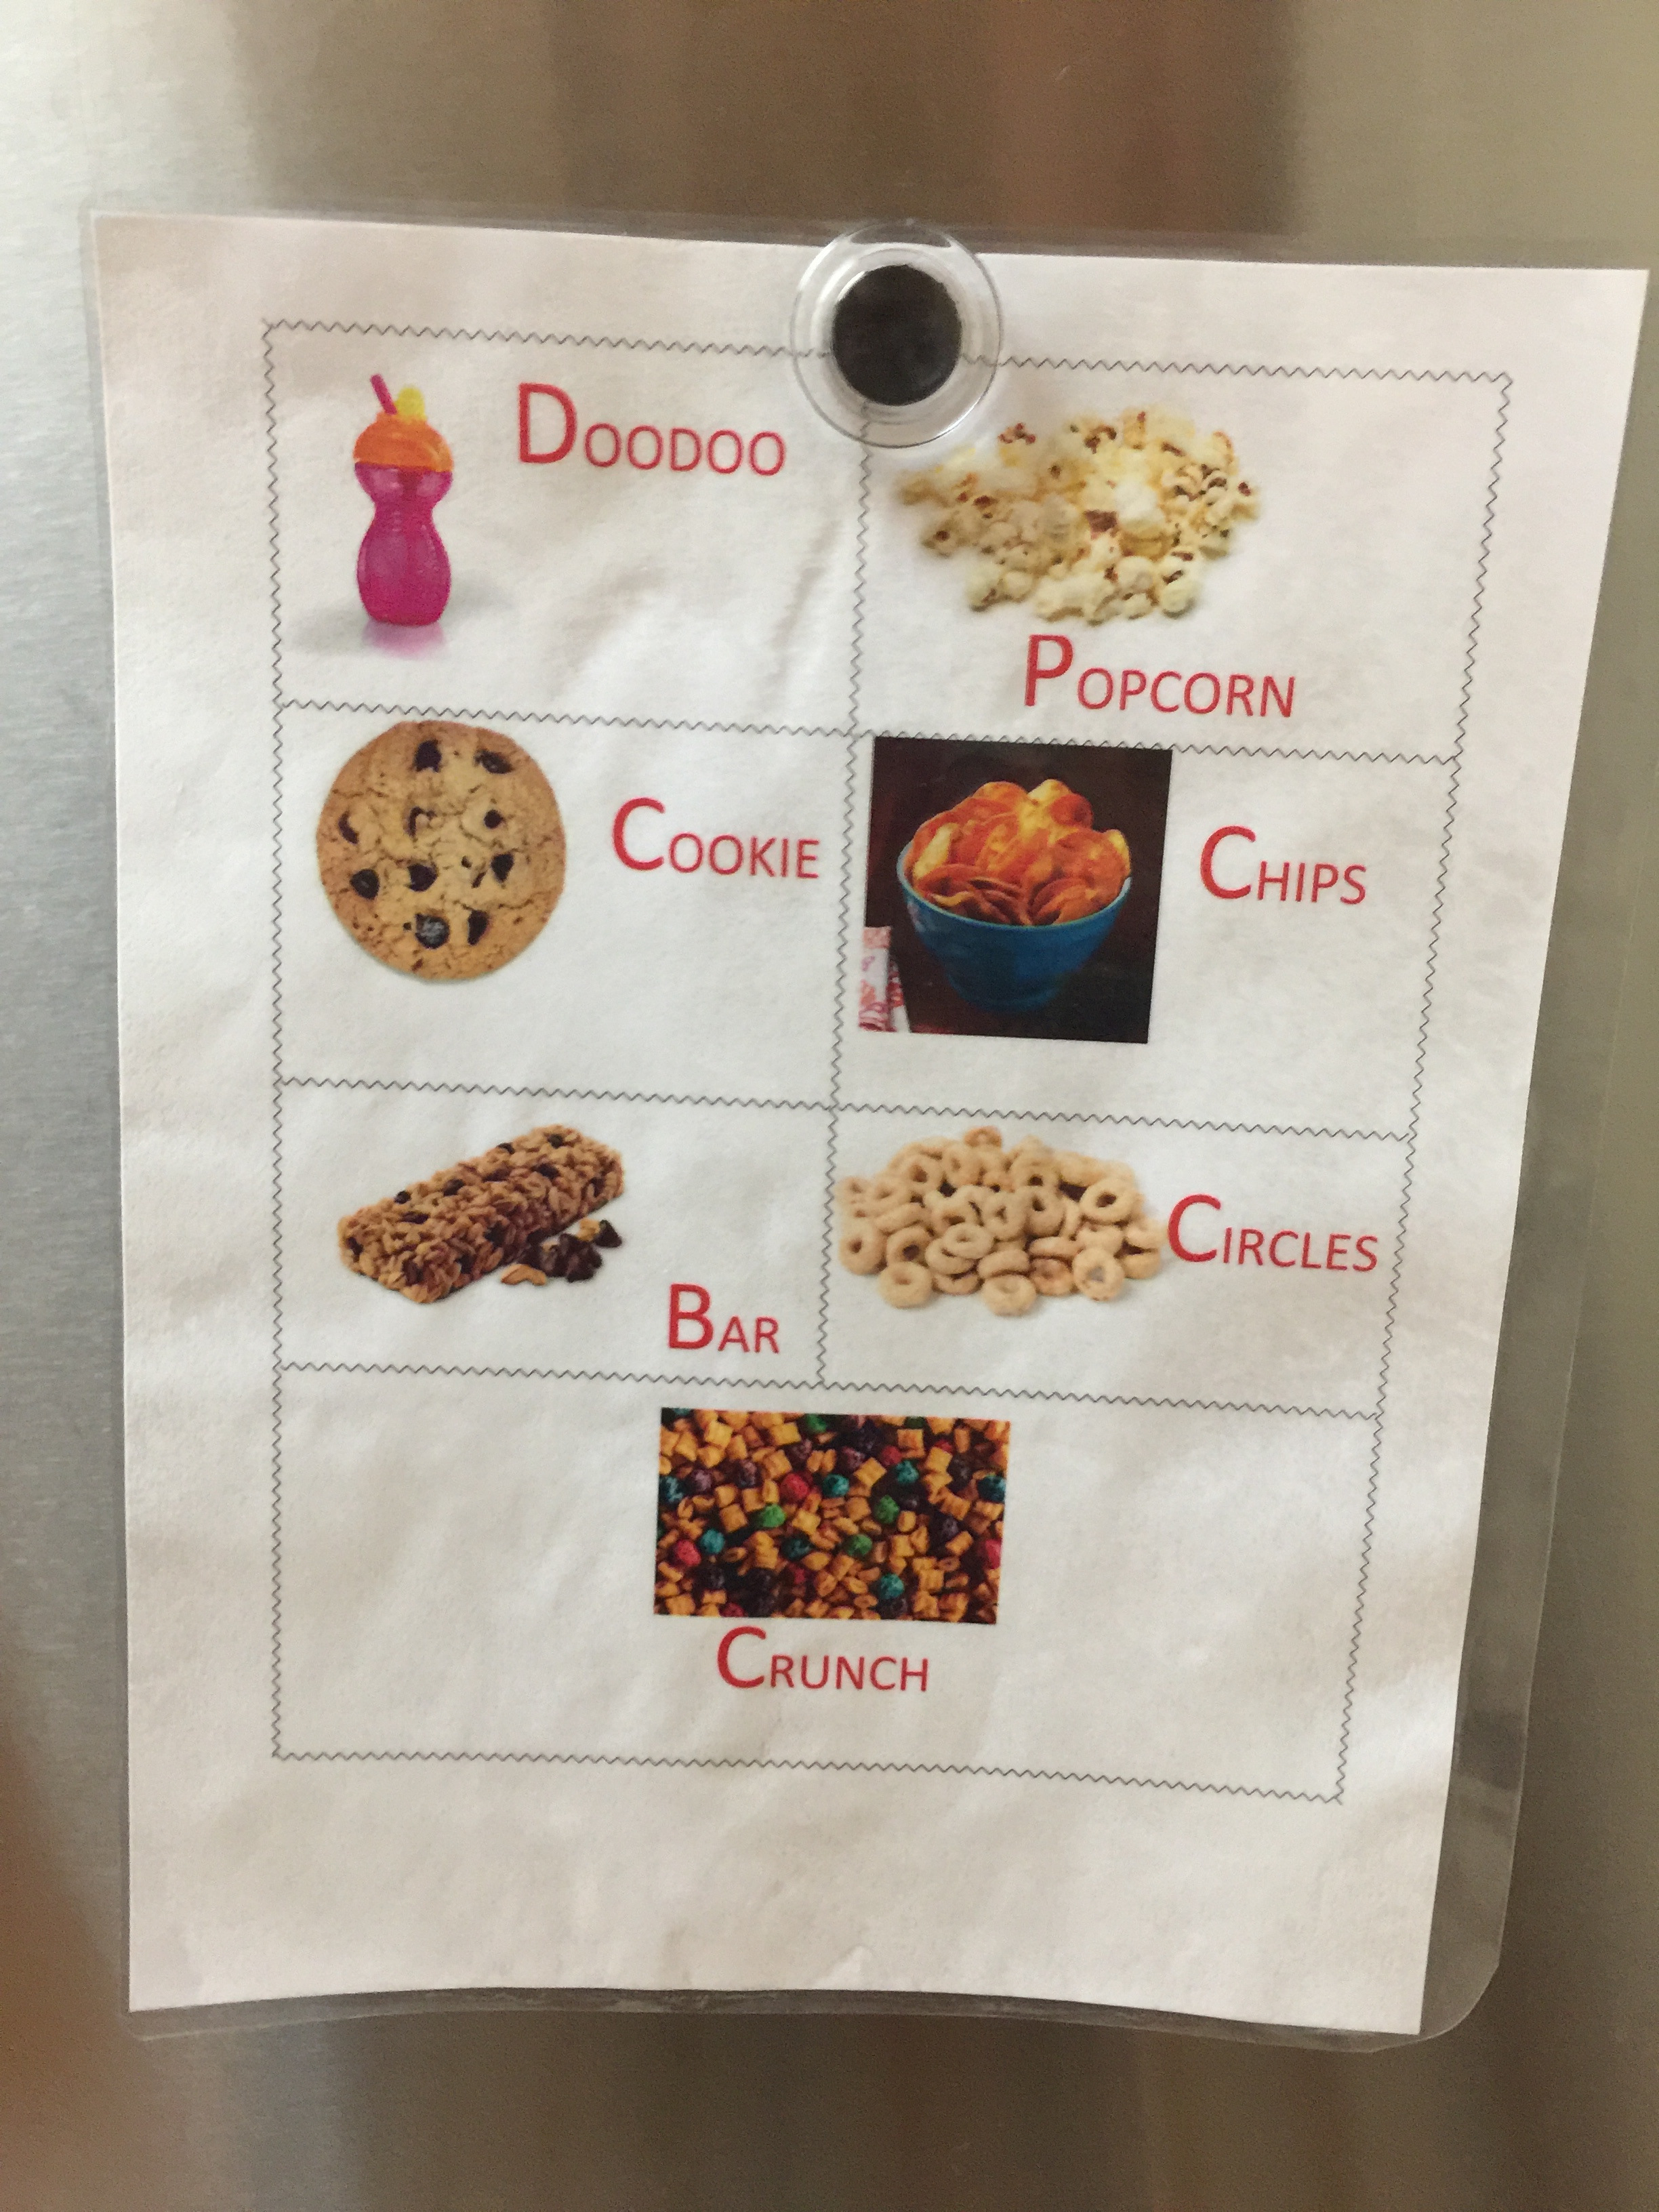
Introducing our life menus!

IMG_1084.JPG

Super simple concept. Choose a few (limit to 6 – 8 items) in each area, print them out and hand it to your child to choose.

Start small. Just do snack time. Or TV shows. Show your toddler the menu and ask them which one. And at first they will point to EVERYTHING.

But stay strong.

Repeat their choice. Have them acknowledge it by having them nod. Hand it to them.

Have them throw it back in your face. and verbalize it. “You don’t want chips? What do you want”

After a few times, they’ll get the hang of it. Through it all remember to verbalize it. So they make the association.

0

Quick DIY headband

I’ve always put headbands on my daughter from the day she was born. I usually just buy a pack of the generic headbands, elastic with a flower on the side. Though these work for most outfits, as she is getting older I wanted to give her a bit more of a formal and subtle look for the head bands. Also, those elastics were starting to get tight on her.

This was really simple to make, actually took less than 5 mins. I had this lace sitting around, but honestly just make a trip to jo-anne or michaels, you’ll find something you’ll like. If you really want this particular one, this one is pretty close.

Gold Headband

1. Measure you child’s head (my daughter’s head is a bit bigger so I can’t really give you an average size).

2. Cut the length that you measure plus maybe 3-4 extra flowers, circles, or whatever makes up your lace

IMG_5795

3. Just sew them together. I used a simple needle and thread and just went in and around each of the flowers

I’m hoping that as she gets older I can simple open it up and move the flower over one.

0

Eid Mubarak Treats!

So this weekend was one of two biggest holidays in the islamic calendar, Eid-ul-Fitr. I wanted to take some treats to hand out to the little ones at the mosque but I was pressed for some time!

I just grabbed a bag of chocolates, left over scrap book paper I had and some sandwich bags and got to work.

I got this image of Eid-Mubarak and used it to make simple circle images on a word document and printed it out

Eid_Mubarak

Then I cut some scrap book paper into rectangles, folded them over sandwich bags with candy and stapled them shut. I then glued the printed Eid-Mubarak image (I ended up using the scraps of paper as a contrast for the circles) over the staples and Viola.. all done!

Eid Treat

The kids loved getting these! Hope you and you family had a lovely Eid this year!

0

Indoor Picnic Birthday

My lovely husband turned 30 today! Woohoo! His birthday falls in the summer, perfect weather for a picnic celebration right? Only problem is that its Ramadan, which means that we are fasting from sun dawn to sun set. With the sun setting at almost 9 PM it seemed impossible to have a picnic. Nevertheless I wanted to do something special and intimate.

I decided to throw him a small surprise party with just his family. However, with a 9 month old in my arms, an intense summer course (I’m working on getting my Masters in Public Health) and my co-conspirers (his brother and sister) being the one taking him out so that I could set up I needed to make this a very easy project.

So I took it one thing at a  time.

Theme: Indoor Picnic

Food Type: Picnic Food/ traditional Iftaar (food that we typically eat to break our fast with)

Decor: DIY with scraps around the house!

Entertainment: Easy games for the family (MUST AVOID TURNING ON THE TV!)

I wanted some what of a back drop that said “Happy Birthday” without having to buy a cheesy banner from the dollar store. I had some of this awesome chalkboard adhesive left over that I used as the center piece for my back drop. I stuck it on a piece of cardboard. It actually was a box from amazon that I cut to size. (Re-use those scraps!) I ended up writing a few major numbers in his life, like the number of houses he’s lived in and the number of major graduations. To make it a bit more festive, I just added a few tags along the edges. This was easy and I did it during the week during a nap time!

quick & easy

quick & easy

I accented the back with half paper rosettes. Again, really simple, I took a 12×12 scrap book paper (If you don’t have scrapbook paper, use wrapping paper or even print out patterned paper and just tape it together to make a giant square) and I folded it accordion style, the way you fold a fan. Then I pinched the center and folded it up and taped the edges together.  If you want to get fancy you can make a full rosette by using a rectangle instead of a square!

Easy set up!

Easy set up!

My food is fairly simple: Hot Dogs, Burgers and Chips. For the Iftaar part I had Papri Chaat, samosas, spring rolls and fried Chilli (recipes to come).

I added a few fun theme items to the table like: personalized glasses (They are just labels printed out). I made it themed like by wrapping the utensils in a napkin. The drink I served was a mix of Iced tea and ginger ale. Again super quick to make and really refreshing in the summer!

IMG_5549

And for desert was some fresh pineapple. I made an easy arrangement by slicing a pineapple as you would.

  • Chop off the head and the bottom.
  • Holding the pineapple vertically slice down each side to get the scales off
  • Then make horizontal slices.

I didn’t have any lollipop sticks, so those chopsticks from sushi night take outs finally came in hand! I just made sure there weren’t any splinters and used them to anchor my pineapple in the core. BONUS: You have a real excuse as to why you didn’t cut out the core!

IMG_5551

I opted not to make a cake because I really didn’t want any left overs! Instead, I bought mini cupcakes from the local groceries store. I put them on my cake stand with tea candles. I used some candy melt (you could really use icing too if you have some around, or just melt some chocolate chips) to write Happy Birthday. I ended up using a chopstick as my pen for this part because toothpick was just too thin and was taking way too long!

IMG_5552

I made him a party hat, because let’s face it, no party is complete without a party hat. Again really simple.

  • Took a 12×12 scrap book paper and rounded out the edge.I folded it like a cone and taped it together
    • There are tons of templates out there with tabs. I feel like those never seem to work for me.
  • I then hot glued some elastic I had lying around, but you could use ribbon or just a rubber band if you wanted.
  • For the pom pom on the top I just took some yarn and rounded it into a ball and hot glued it on to the top
  • I then just cut out a 30 out of left over scrapbook paper and hot glued it

I made a mini hat for my little angel as well 🙂

IMG_5568

I kept the decorations simple by just making a crepe paper curtain and hanging a tissue ball pom pom from the center.

IMG_5569

The games I decided to go for What would he do? (a series of scenarios where his family had to guess what he would write down as his answer, like which flavor chips he’d pick?) and Flash back 30 (A basket of 9 items that are representative of him that everyone looks at for 30 seconds and has to list out after). We finished the evening with a classic game of charades!

IMG_5566-1

It was low key and fun. Lots of laughs and just good old family time! Definitely a night to remember!
0

First Time Sewing – Baby Quilt

Before this project the only kind of stitches I knew how to do were surgical stitches. But I was expecting my baby girl and wanted to make something! Excitingly, my sister was excepting her second child around the same time. Therefore I made two matching baby quilts for these cousins. Believe it or not, the first one I didn’t own a sewing machine yet, so I made by hand! It took about a week (only because I’d work on it after dinner for about an hour since pregnancy made my energy level plummet)

I wanted to buy gender neutral material for both the quilts. I really didn’t see the point in spending the time cutting individual squares, but if you have the scrap cloth this is a great place to use it up! I ended up buying these cute alphabet squares from amazon.

quilt squares

While my husband fantasizes about a large office to host his books and I fantasize about a hobby room where I can leave my projects out, we live in New York, and space is precious. So I don’t really have room for much equipment. Don’t ever not do a project because you don’t have the equipment. Get creative! There is always a way around.

There are so many great instructions out there on how to quilt, no need for another post. I ended up using Sew Adorable Fabrics’ guide as my basic instructions on how to assemble the squares together.

Once I had the squares assembled, I bought this batting from my favorite store..yup you guessed it. Amazon. Then I started to come up with my own quick steps. My patience was running low.

semi finished quilt

semi finished quilt

I cut the batting about 1/2 inch bigger on all sides to my assembled squares. I had an old flat sheet that I was using as the backing. I pinned all the corners together and sewed the whole thing around the edges.

To give it a finished looked I used Haberdashery Fun’s instructions on how to sew on a border around my quilt.

And tada! Here are the two munchkins just under 2 weeks enjoying their matching blankets!

Munchkins!

Munchkins!

0

Bookshelf or Baby Wardrobe?

When I found out I was expecting, all these new feeling started creeping into me. I wanted to..MAKE things. Call it nesting. I had never made anything so this was going to be quite the learning curve! I started to channeling my energy towards building the perfect nursery! Only problem was, we live in a 1 bedroom apartment in New York. Meaning: No space. There was limited space to buy new furniture so some repurpose was needed! Our first project was to convert our old generic black bookshelf into a baby wardrobe to increase storage. Meet boring bookshelf:

Boring bookshelf

Now meet cute little baby wardrobe:

Quite a transformation? Believe it or not it only took a few purchases:

Wood 3/4″ plywood from Home Depot:

STEP 1: Pre measure the width of your bookshelf and minus about 1/2″. Pre measure the height of your bookshelf.

STEP 2: Ask the assistants at home depot to cut you a piece that is that exact height and width that you measured. Then ask him to cut the whole piece down he middle to make two doors.

  • *Don’t worry too much about the exact inches. They won’t be able to cut it exactly.

Sand paper

STEP 3: Because our shelf had that glossy laminate finish, we had to sand it down a bit before we could paint it.Sandpaper

  • Being novice at this whole DIY thing, we didn’t have ANY tools! So we bought these handy dandy sand paper blocks!
  • To reduce the mess we placed an old bed sheet on the ground and placed the bookshelf on it.
  • We removed each of the shelving before starting to sand it.
  • Because we wanted to wallpaper the inside, we didn’t need to sand the shelves or the inside of the book shelf. If you plan to paint it and have a laminate finishing, you’ll need a bit more elbow grease and need to sand a bit more

Paint:  We already had the yellow and white paint along with primer from the paint job in the kitchen.

We got some basic supplies from home depot

  • Paint Roller – Paint Tray
  • Large rubber gloves
  • Paint Thinner (for all those drips that are unavoidable on our floor)

STEP 4: We just painted the bookshelf white (took ~3 coats to go from Black to completely white) and the doors a yellow and let them dry.

Attaching the doors 

Hinges

STEP 5: We chose these very cute (and cheap) hinges to attach the doors of our closet to the bookshelf. We attached two on each door, one near the top and one near the bottom.

Having never attached a hinge before it too some trial and error to determine how exactly (which side is on the door and which is on the bookshelf) to attach it. In the end we found that it looked better and was more stable if the hinge was on the edge of the shelf and on the inside of the door. Some times hinges are attached on the inside of the cabinet and the outside of the door. That works best if the door sits inside the cabinet. We wanted to maximize the inside space so we didn’t do that.

Door knobs and magnetic closure

STEP 6: We bought generic wooden door knobs and painted them white and simply drilled them into the plywood doors

Magnetic Catch

STEP 7: It’s my pet peeve to have a door that doesn’t close! So to solve this problem we simply bought this magnetic catch. This was the easiest thing to install! And it works perfectly

Interior 

STEP 8: We decided to wallpaper the inside just to add some pattern to the wardrobe vs painting it a solid color, but you can do whichever works best for you. We used this really cute candy striped wallpaper. It was really easy to attach to the shelf.

  • We pre-cut each of strip of wallpaper we need according to the inside of our closet (always leaning on bigger over smaller). Then filled our tub with water, let the cut piece of wallpaper sit in there for 5 mins, removed and pasted it onto the book shelf. We used a regular dish washing sponge to smooth out any bubbles.
    • BE PATIENT! LET THE STRIPS DRY COMPLETELY! (I wasn’t and definitely messed some parts up)

Rod

STEP 9: After the interior was done, we just attached a rod to the top part of the bookshelf to give us some fabulous hanging space…and VIOLA all done.

Ok… so maybe this was a bit more involved and took like a week to complete! But it was still very easy steps!